Deploying the Brain
Overview
In this lab you will be using AWES CloudFormation to deply the Vectra Brain.
AWS CloudFormation provides a common language to describe and provision all the infrastructure resources in your environment in a safe, repeatable way.
Brain Deployment
Before you start download the CloudFormation Template
You will also need to make sure you have a provisionToken procived by doing a Ultimate Case, or provided by TME or Enablement.
Deploy The Brain
In the search bar, search for Cloud Formation
Click on CloudFormation
From the Create stack dropdown, select With new resources (standard)
Select Template is ready, and Upload a template file to upload the mainTemplateFromBrain.json you downloaded earlier
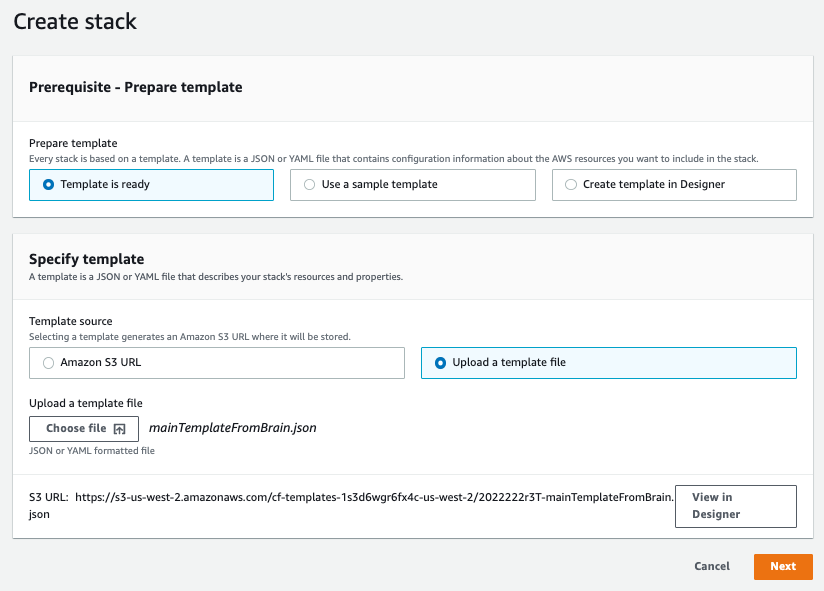
Click Next
Fill in the following fields below:
Stack name - initials-stack
baseName - initials-brain
instanceTyoe - r5d.2xlarge
mgtSubnet - *initials-project-private1-us-west-2a
mgtVPC - initials-project-vpc
provisionToken - *provided by Instructor or TME/Enablement
publicIP - True
sshKey - initials-key
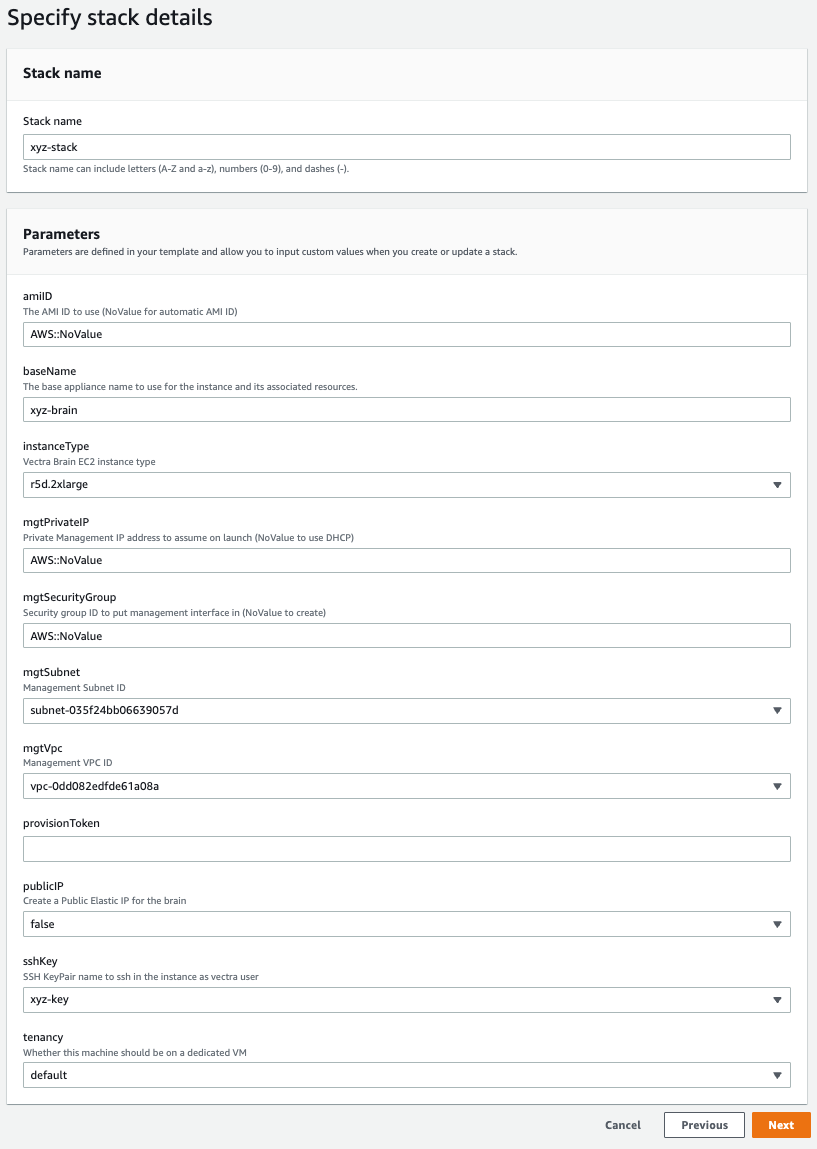
Click Next, and then click Next again
Review your stack config, and then click Create stack
Validate The Brain Deployment
Go to CloudFormation > Stacks
Search for initials-stack
Verify the deployment shows CREATE_COMPLETE
Now lets go look at the instance in EC2. Go to EC2 > Instances > Instances
Search for your initials-brain instance, and click into it and verify the details.
Security Group
We need to edit our sucurity group, and add a new Inbound rule.
Never do that in real life.
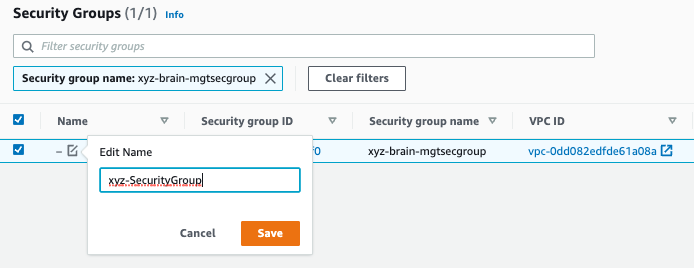
Go to EC2 > Network & Security > Security Groups
Search for initials-brain-mgtsecgroup, and open it
Click , and edit the name of your Security group to initials-SecurityGroup
Click into the Security Group
Click Edit inbound rules
Click Add rule, and fill in the following fields:
Type - SSH
Source - Anywhere-IPv4
Click Add rule, and fill in the following fields:
Type - HTTPS
Source - Anywhere-IPv4
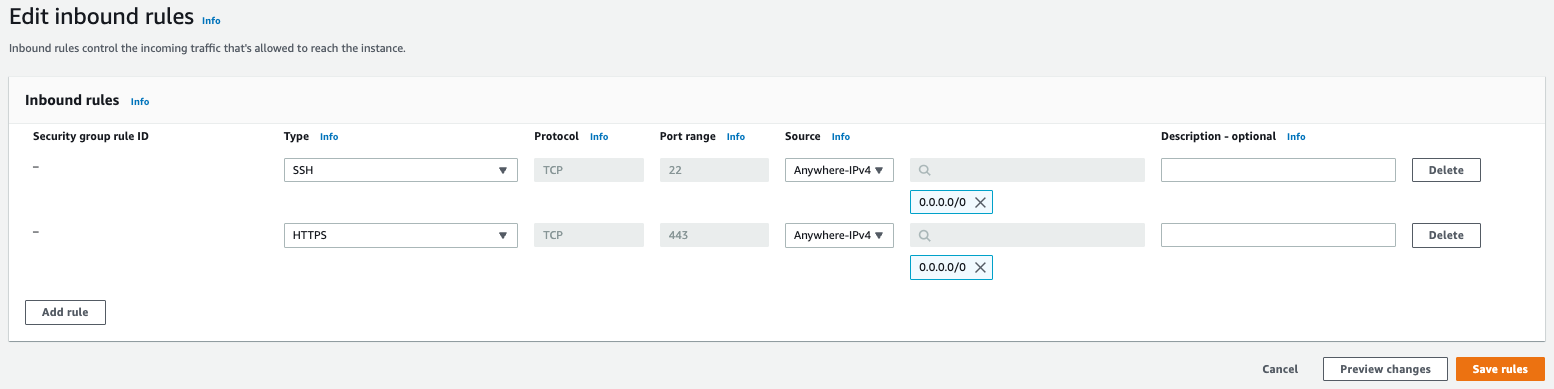
Click Save rule
Connecting To The Brain
You will need the Private IPv4 address for you initials-brain instance
SSH Connection
Change the security rights of your key so you are the only one to access it, run the following command:
chmod 700 ./PathToKey/xyz-key.pem
Now connect to your Vectra Brain appliance using your key, run the following command:
ssh vectra@*Brain-Private-IP* -i ./PathToKey/xyz-key.pem
HTTPS Connection
Now lets go look at the instance in EC2. Go to EC2 > Instances > Instances
Search for your initials-brain instance, and click Connect
Username - admin
Password - Instance ID