Create A New VPC
Overview
Amazon Virtual Private Cloud (Amazon VPC) enables you to launch AWS resources into a virtual network that you’ve defined. This virtual network closely resembles a traditional network that you’d operate in your own data center, with the benefits of using the scalable infrastructure of AWS.
Create A New VPC
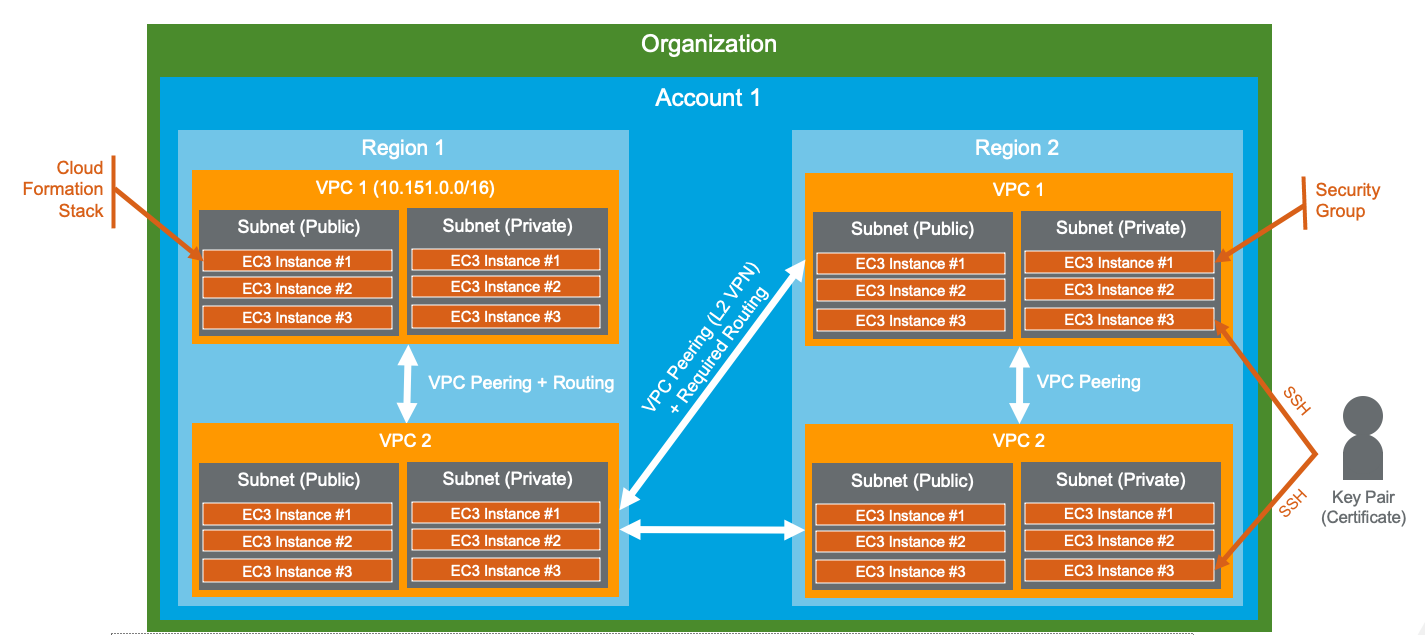
You will go through the steps to achieve the following setup:
Access the AWS Console
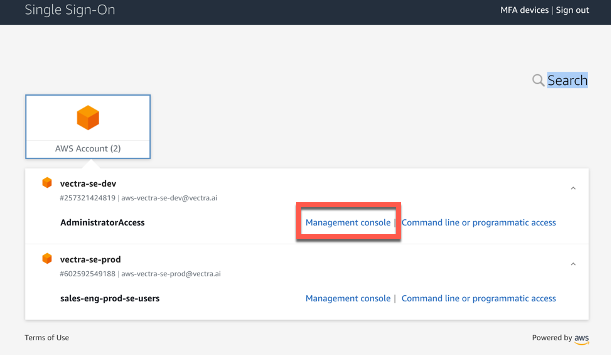
Launch M365 My Apps, and launch Vectra AWS
Under the AWS Account selection, select vectra-se-dev > Management Console
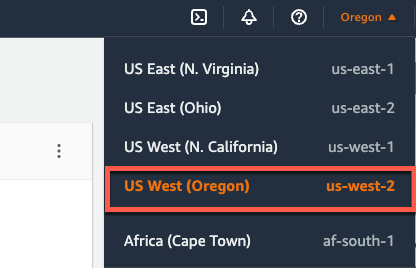
Makes sure your region is US West (Oregon) - us-west-2
Create VPC
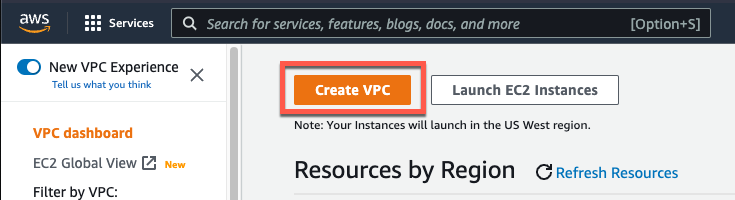
Go to Services > Networking & Content Delivery > VPC

Select Create VPC to launch the wizard
Select VPC and more, and enter the following information:
Auto-generate - Checked
Auto-generate Name - initials-project
IPv4 CIDR block - 10.141.0.0/16
IPv6 CIDR block - No IPv6 CIDR block checked
Tenancy - Default
NAT gateways ($) - In 1 AZ
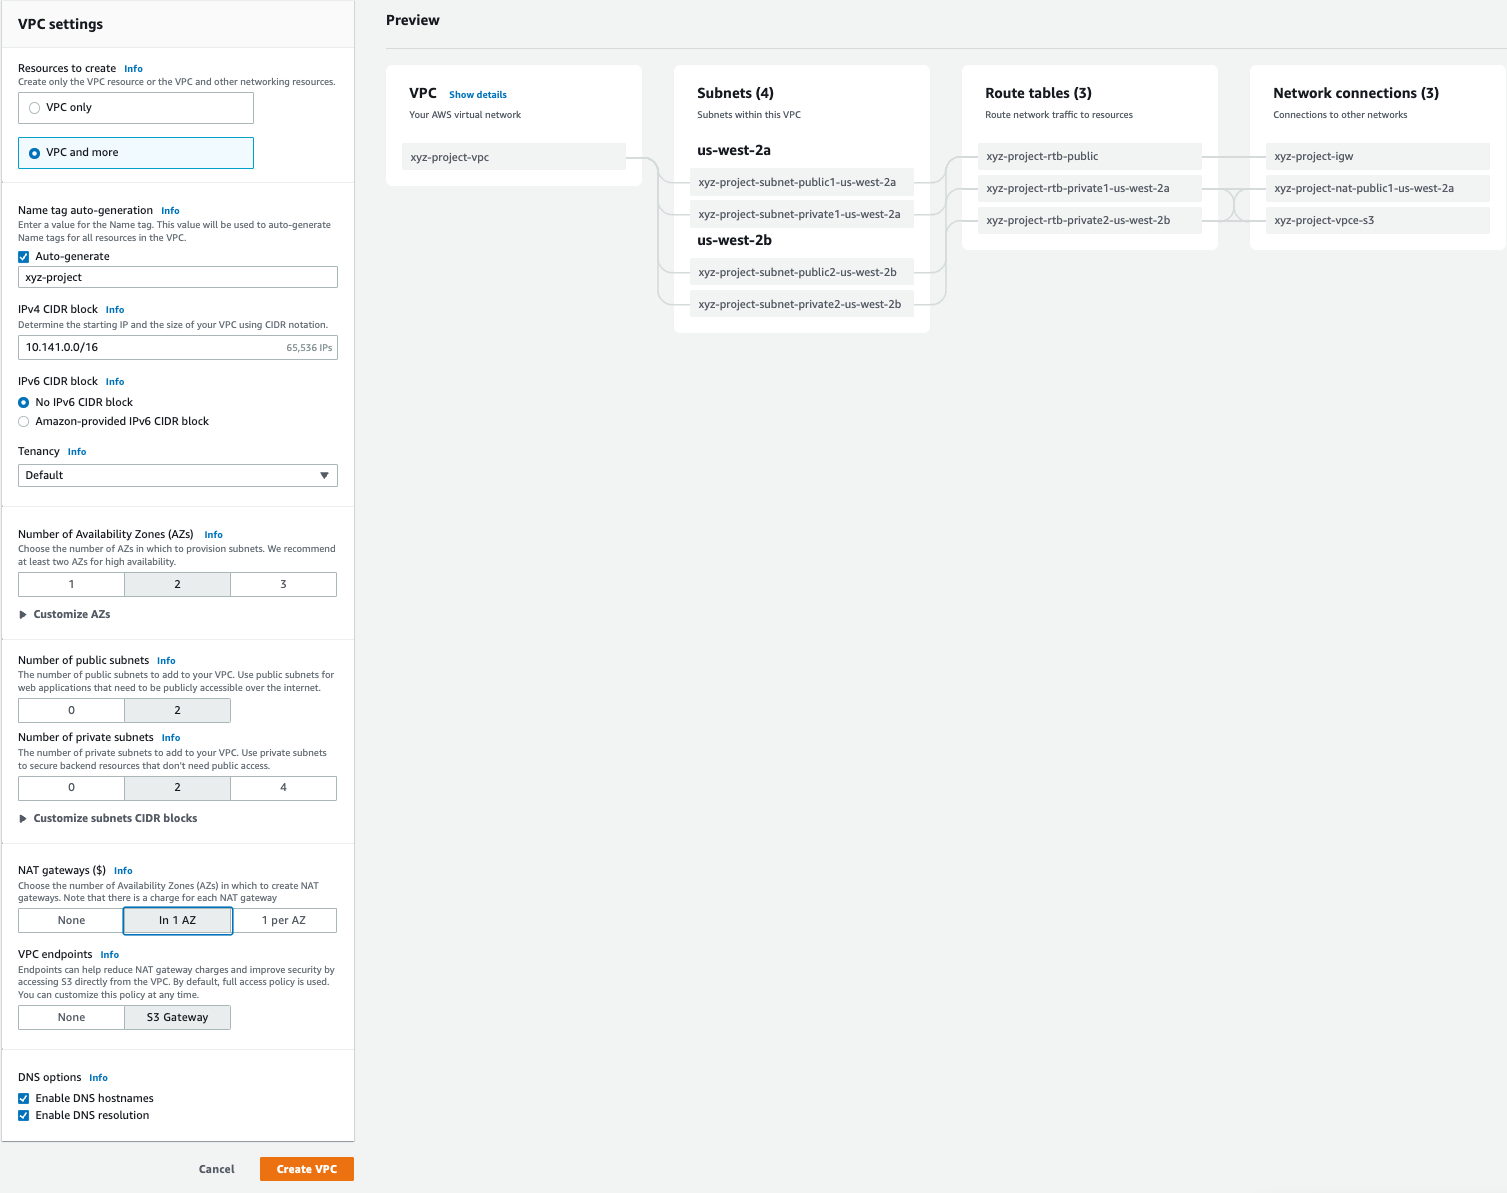
Click Create VPC
Note:
The system might take some time to create the VPC.
The system may stall at 47% if there is an issue with the NAT Gateway. If there are to many machinese you may get this error "Error: The Elastic IP Allication ID could fail"
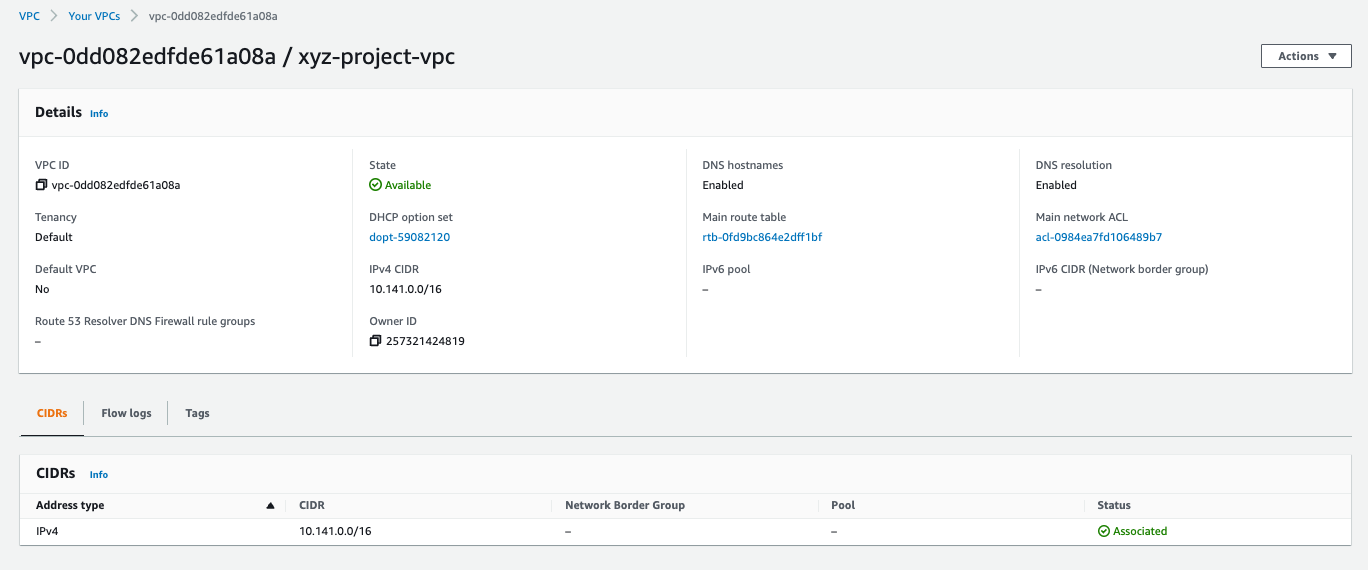
Validate the VPC
Validate the configuration:
VPC Config:
Subnet Config:

Configure VPC
VPC Peering
A VPC peering connection is a networking connection between two VPCs that enables you to route traffic between them using private IPv4 addresses or IPv6 addresses. Instances in either VPC can communicate with each other as if they are within the same network. You can create a VPC peering connection between your own VPCs, or with a VPC in another AWS account. The VPCs can be in different regions (also known as an inter-region VPC peering connection).
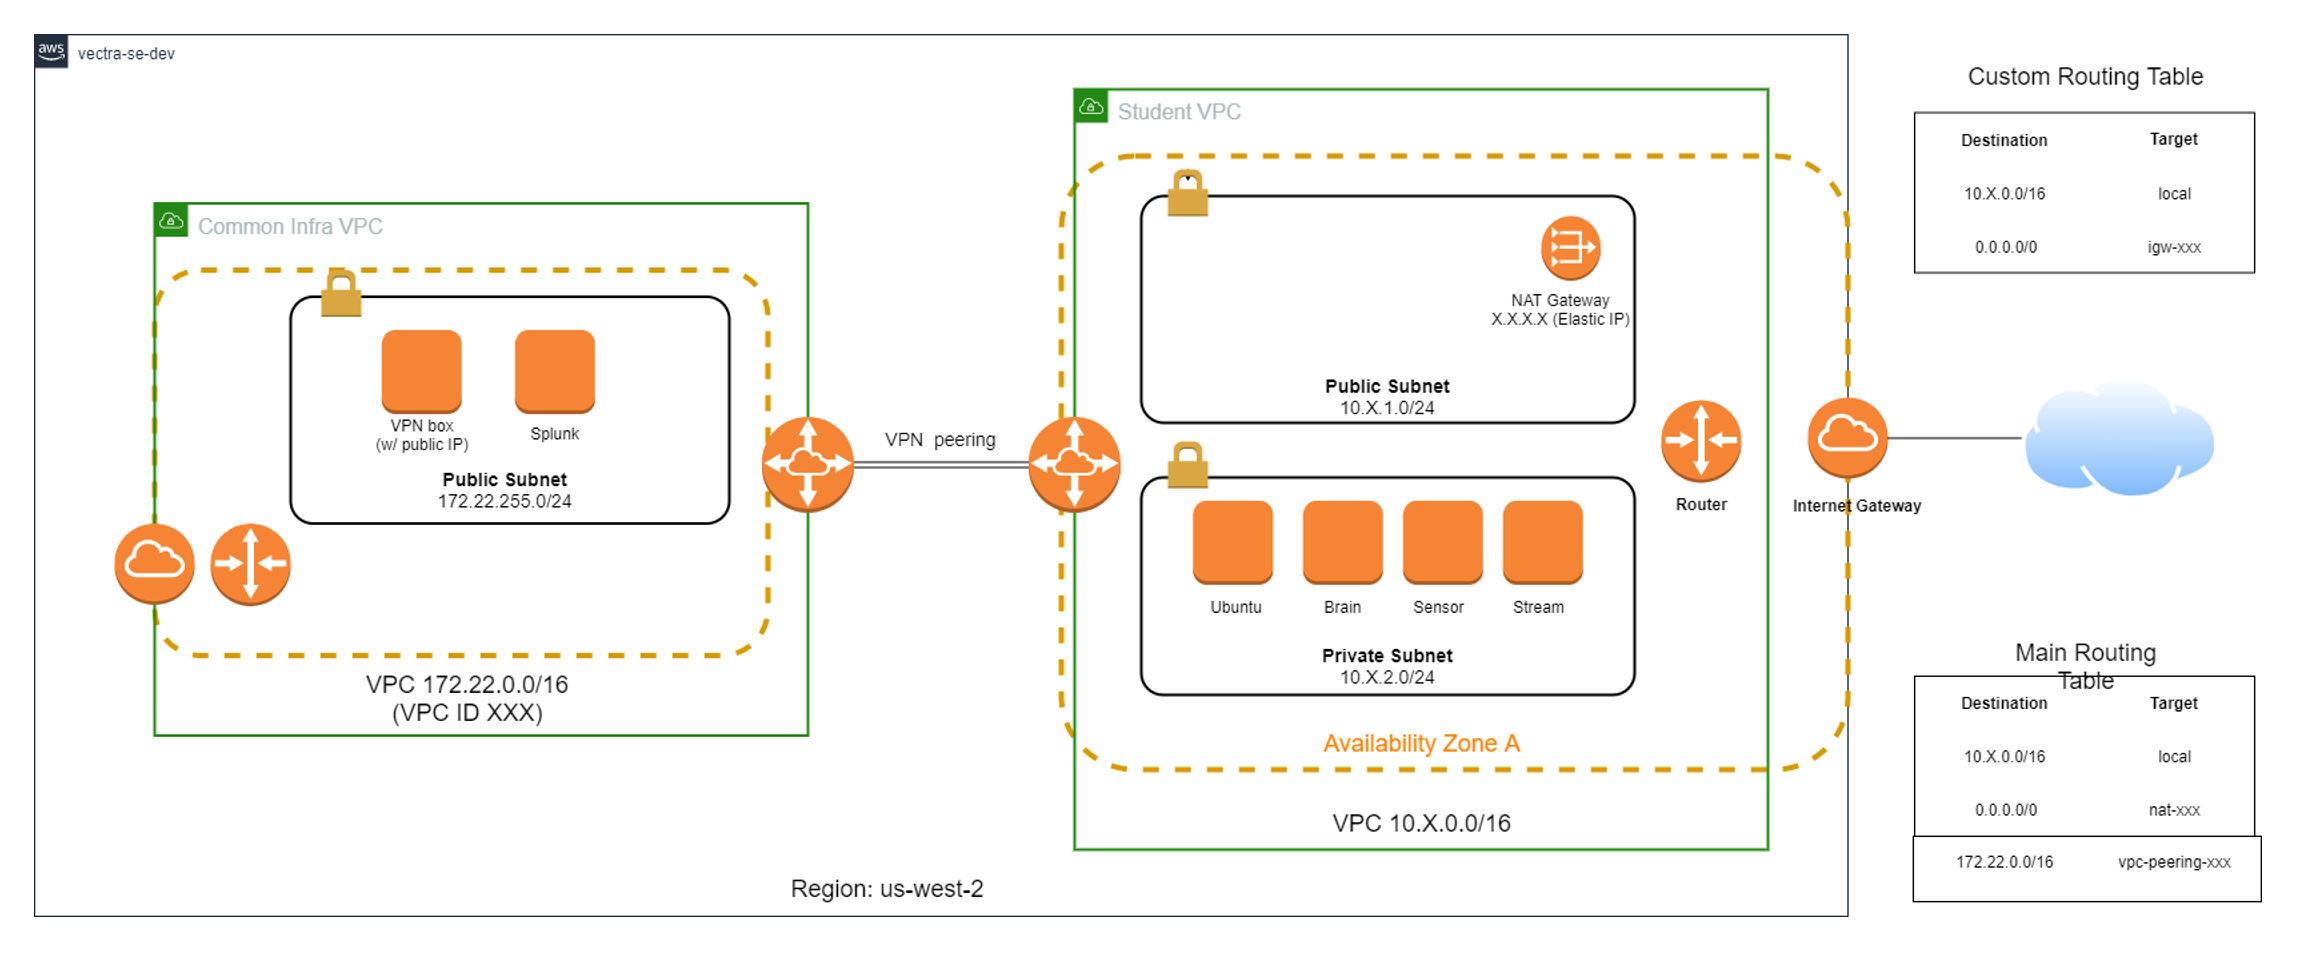
We want to connect the new initials-project VPC to the existing VPC-Common-Infra-SE-Training VPC (L2 connectivity).
Go to Virtual private cloud > Peering connections
Click on Create peering connection
Enter the following information:
Name - initials-peer
Select a local VPC to peer with
VPC ID (Requester) - initials-project-vpc
Select another VPC to peer with
VPC ID (Accepter) - VPC-Common-Infra-SE-Training
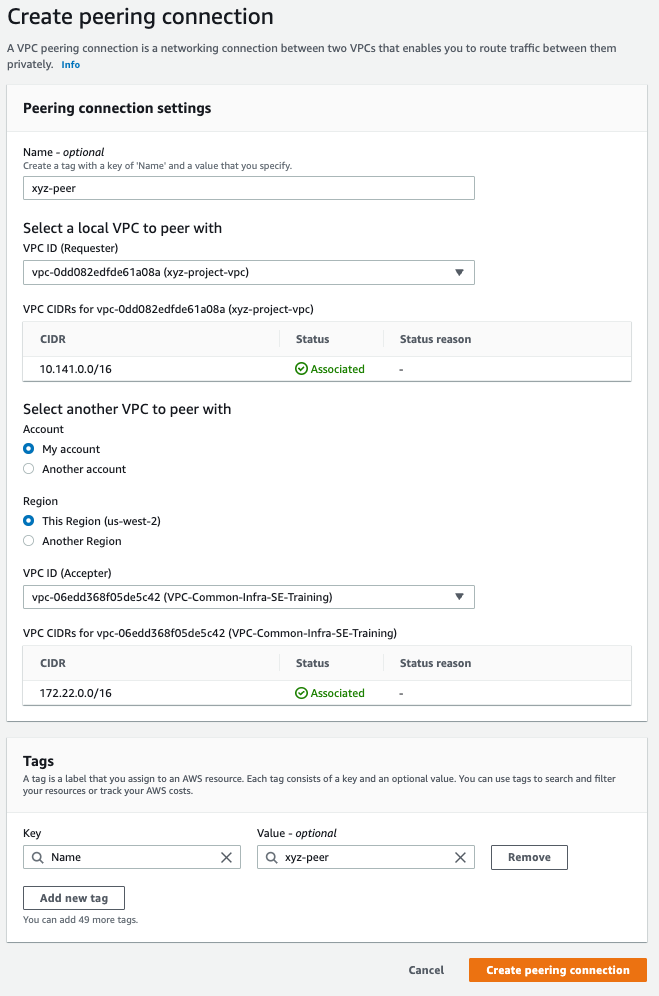
Click Create peering connection
Validate Peer Connection
You will need to accept the Pending acceptance for the new peering connection.
Select your initials-peer connection
From the Actions dropdown, select Accept request
Click Accept request
Make a note or copy the Peering connection ID (EX. pcx-061480711c632****), this will be used later to create routes
Your Status should show Active
Add Routes
A route table contains a set of rules, called routes, that determine where network traffic from your subnet or gateway is directed.
We want to setup routes from the new initials-project VPC to the existing VPC-Common-Infra-SE-Training VPC.
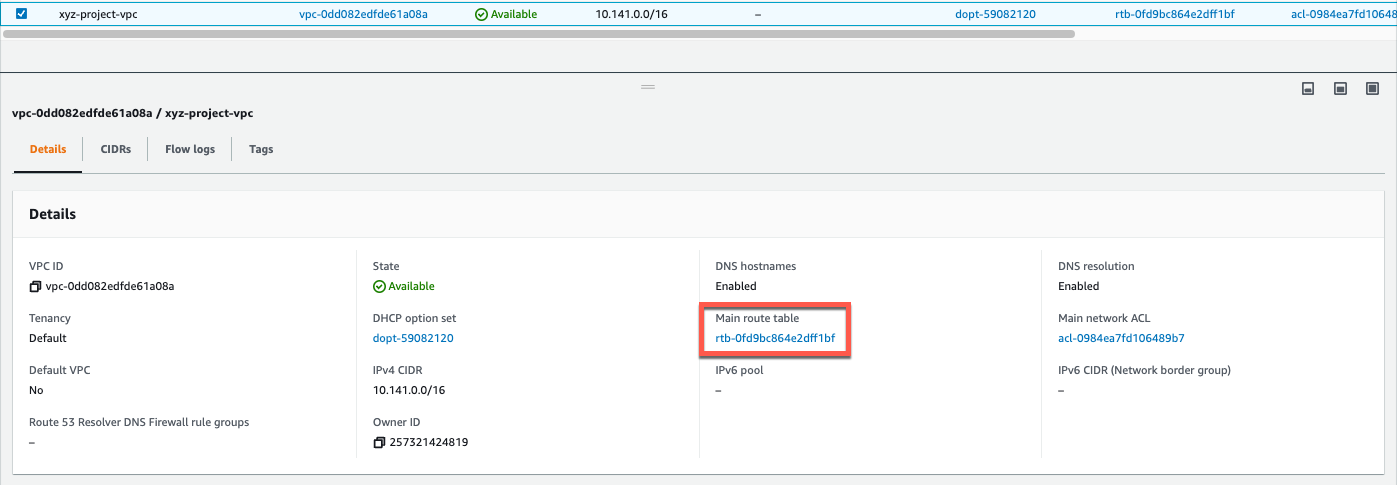
Go to your initials-project-vpc VPC
Select the Main route table
From the Actions dropdown, select Edit routes
Click Add Route, and enter the following information:
Destination - 172.22.255.0/24
Target - Your Peering connection ID from the previous section

Click Save changes
Go to the VPC-Common-Infra-SE-Training VPC
Select the Main route table > RT - Common Infra SE Training
From the Actions dropdown, select Edit routes
Click Add Route, and enter the following information:
Destination - 10.141.0.0/16
Target - Your Peering connection ID from the previous section
Click Save changes
Create A Key Pair
Key Pairs are used to SSH to any Linux instance, or decrypt Windows password. In our case, will be used to access the Brain & the sensor with SSH
In the search bar, search for Key Pairs
Click on EC2

Select Key Pairs under Network & Security
Click Create key pair, and fill in the fields below:
Name - initials-key
RSA - Checked
.pem - Checked
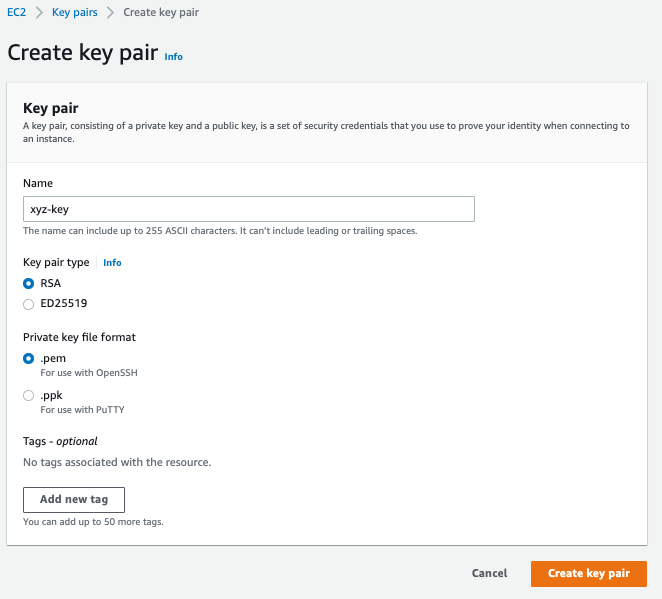
Click Create key pair
Save the key in a secure folder on your computer, as you will use this to connect to the brain via the CLI.
Note: If you lose this key you will not be able to connect to your brain, and you will have to redploy a new brain.
Please secure them by applying an access right such as 700 so you can only use them yourself.
This identity theft is one of the most common attack vector in AWS